Course Information

PLAY NORTH AMERICA'S LONGEST GOLF COURSE!

Tee Of In Windsor, CO

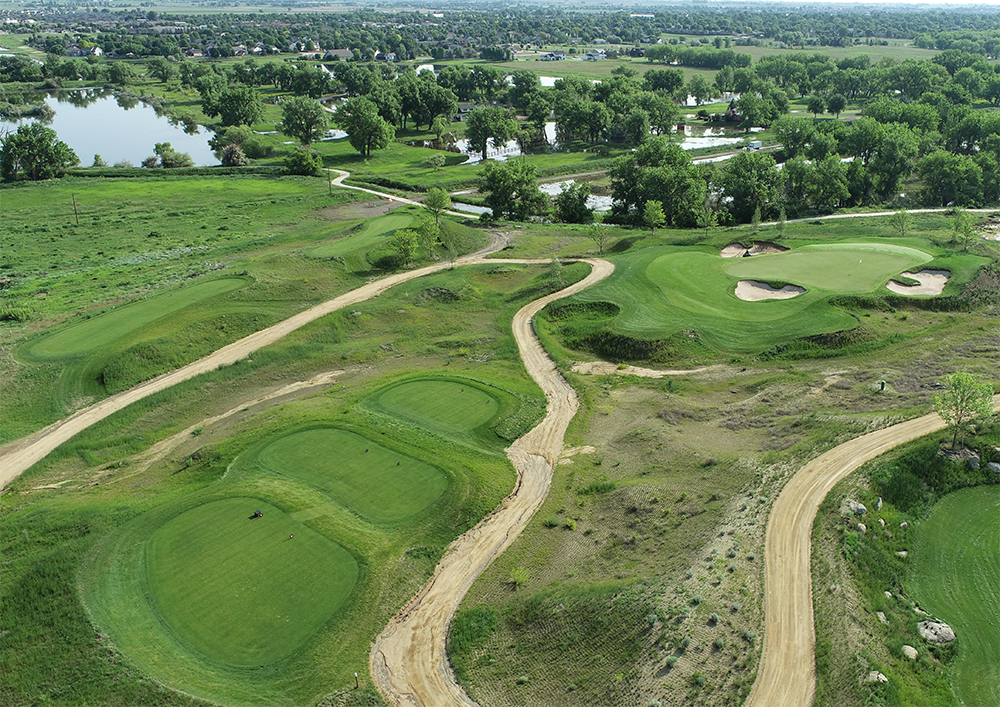
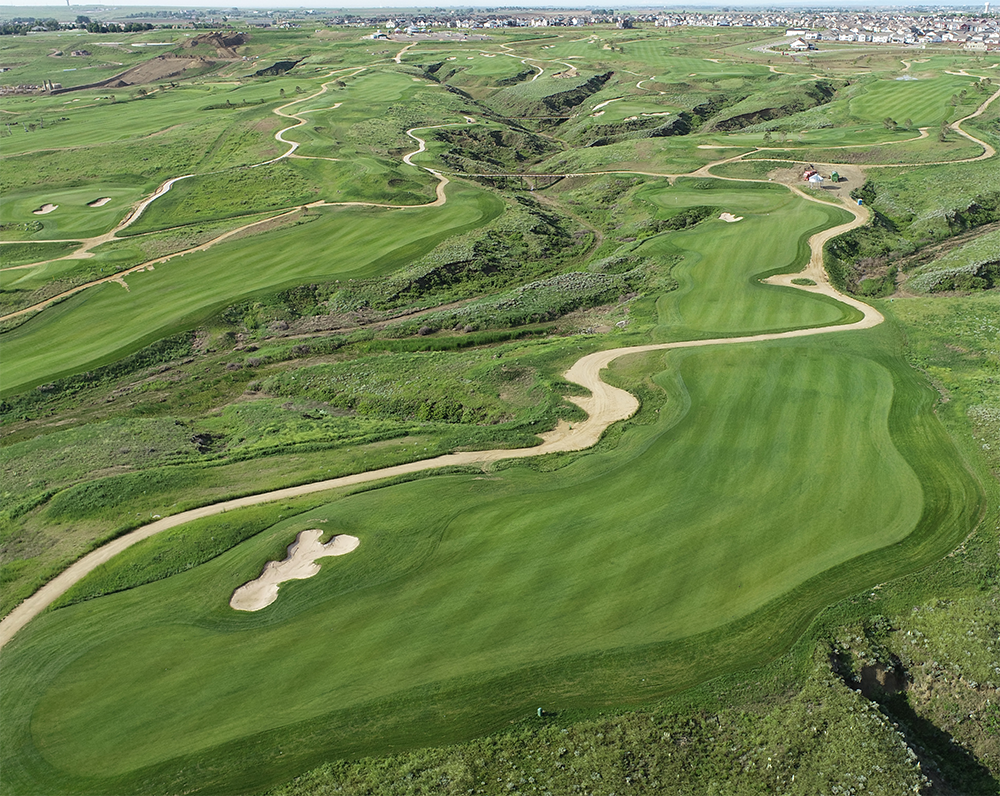
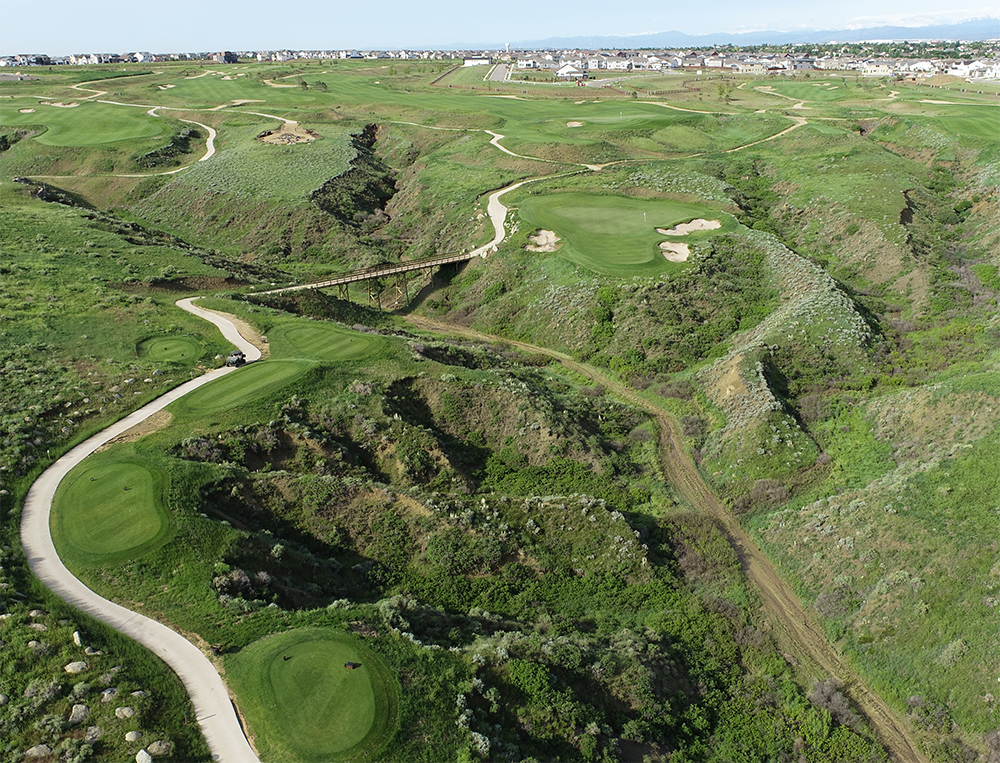
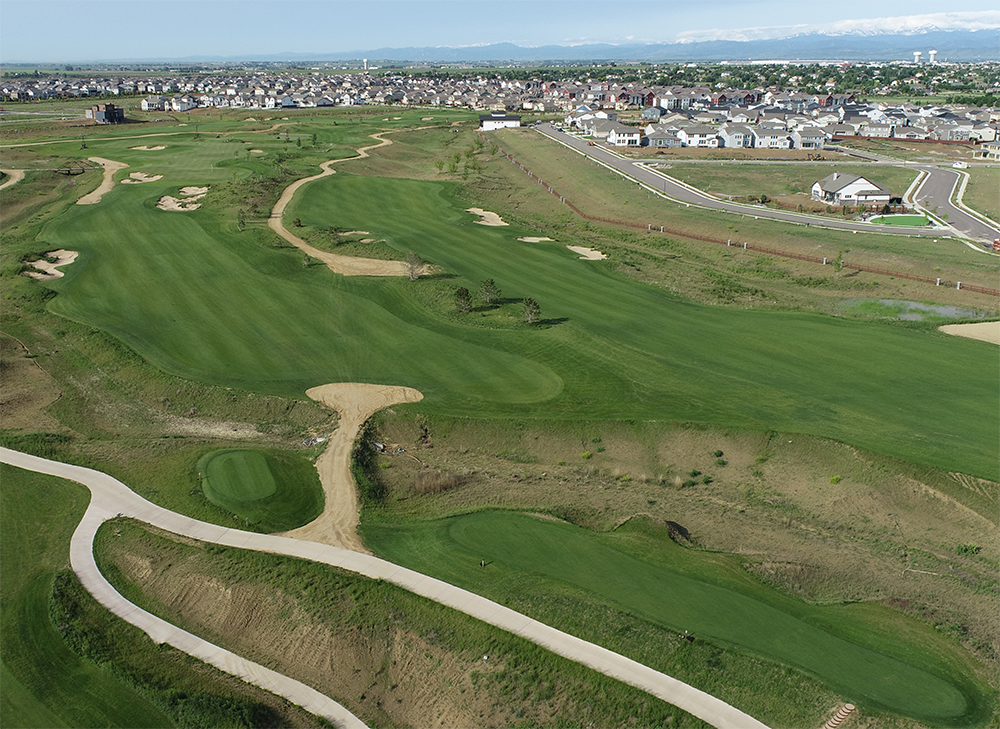
With the opening of the RainDance Resort golf course, Windsor, CO is a premier golfing destination. Westward mountain peaks give way to an open valley in the northwest, providing a beautiful backdrop for a round of golf. The 8,400-yard, 18-hole golf course is situated in the high plains, with an elevation change of about 250 feet.
Good news for local golfers: You can experience resort-style golfing at RainDance Resort. To book a tee time, give us a call at 970-833-1720

Championship Credentials. Legendary Design.

Designed By A PGA Tour Champion

If you follow the PGA Tour, you’re likely familiar with Fred Funk. But if not, here are his claims to fame:

  • 8 PGA Tour wins
  • 9 PGA Tour Champions wins
  • Induction into the University of Maryland Athletics Hall of Fame
  • Maryland State Athletic Hall of Fame

We’re pleased to announce that Fred Funk designed our 18-hole golf course. Visit RainDance Resort in Windsor, CO to play a golf course fit for the pros.
COURSE GUIDE

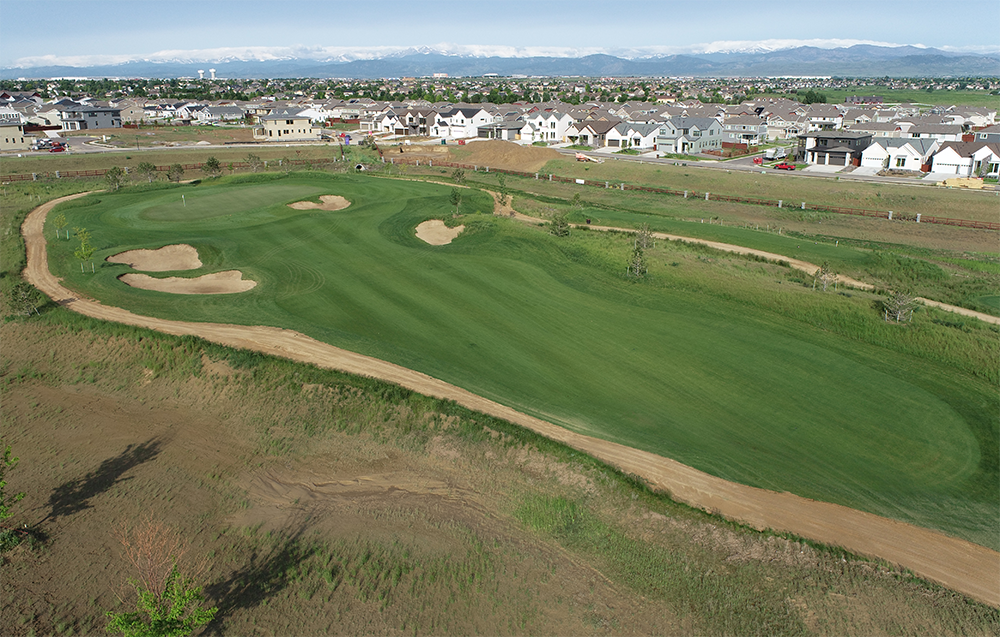
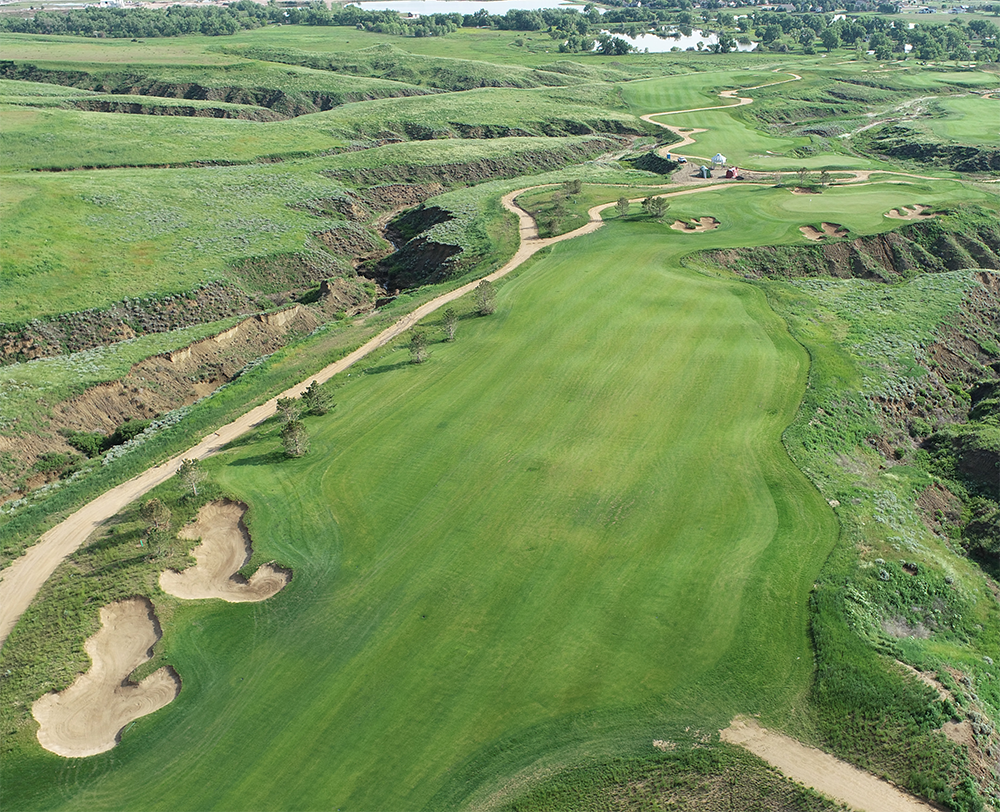
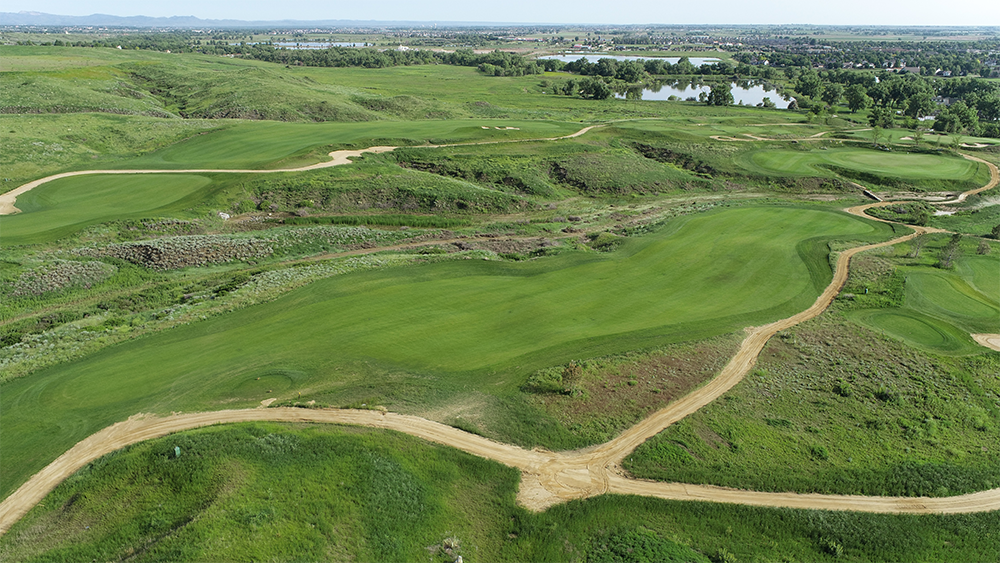
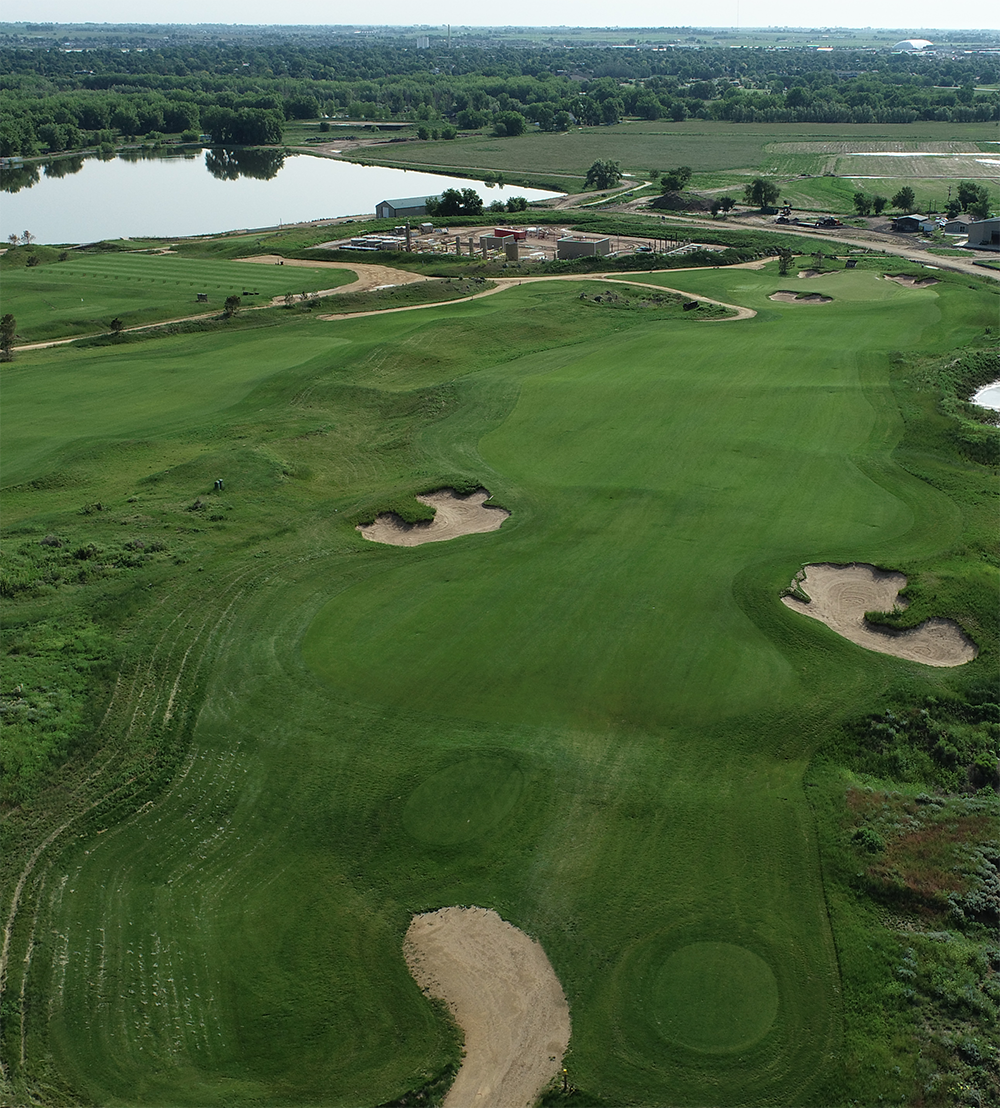
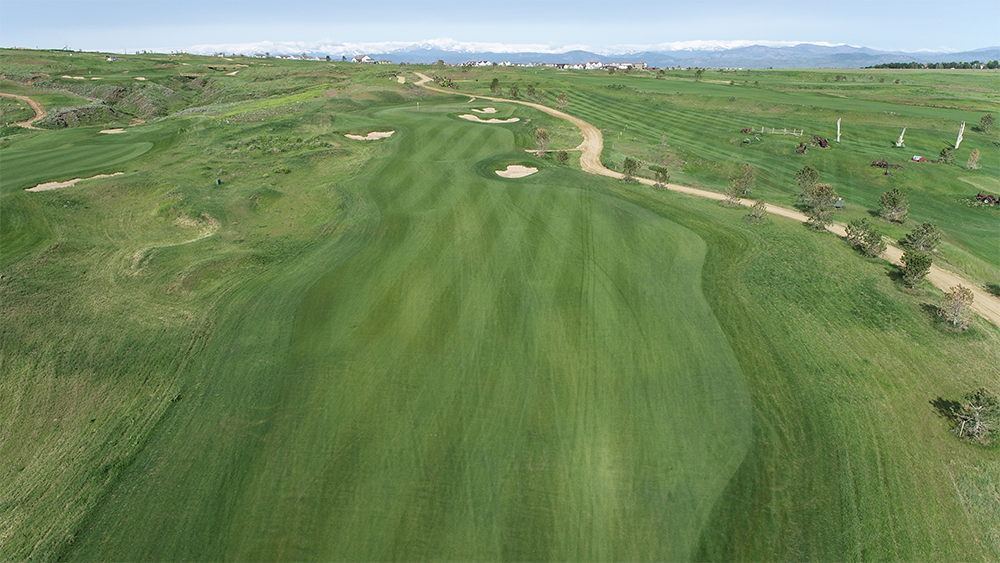
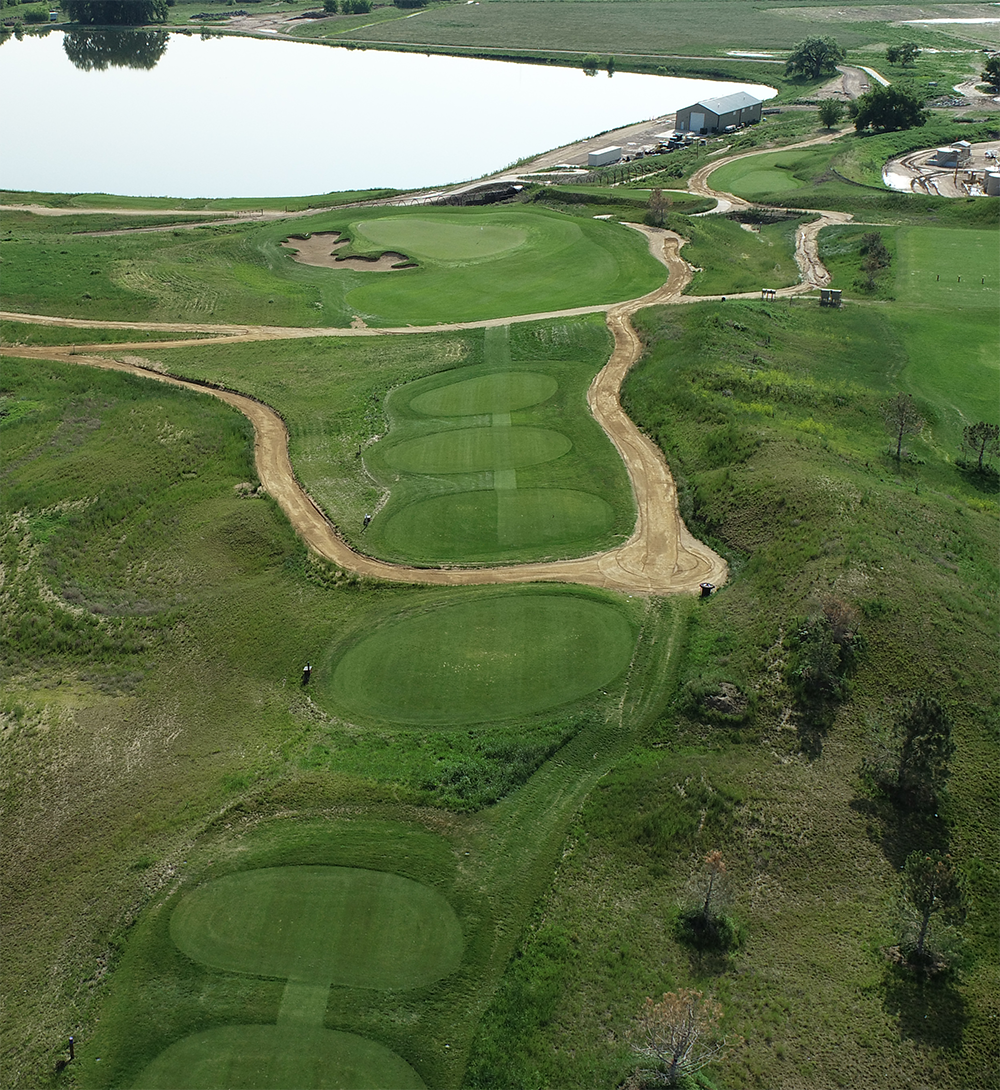
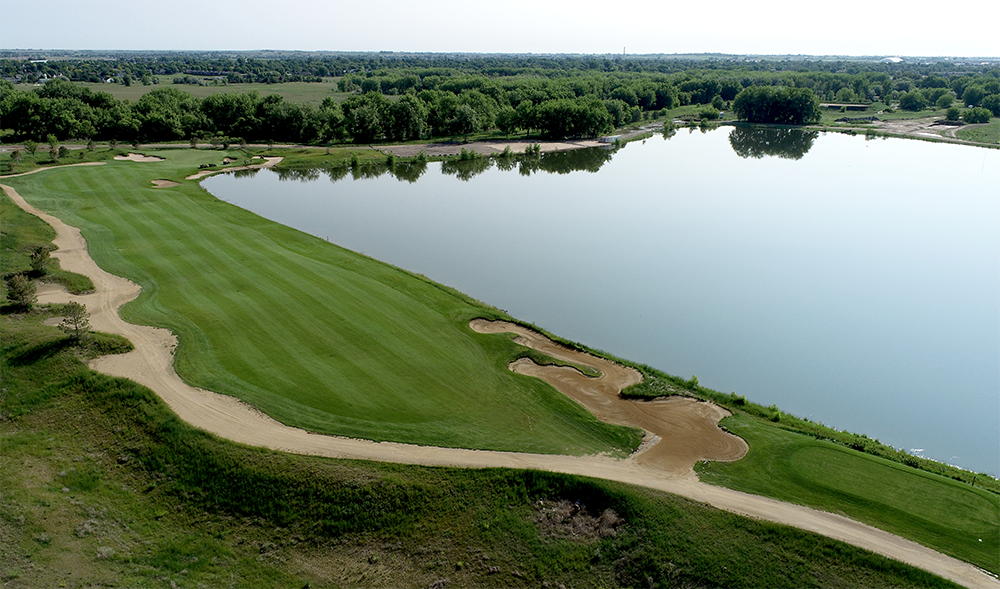
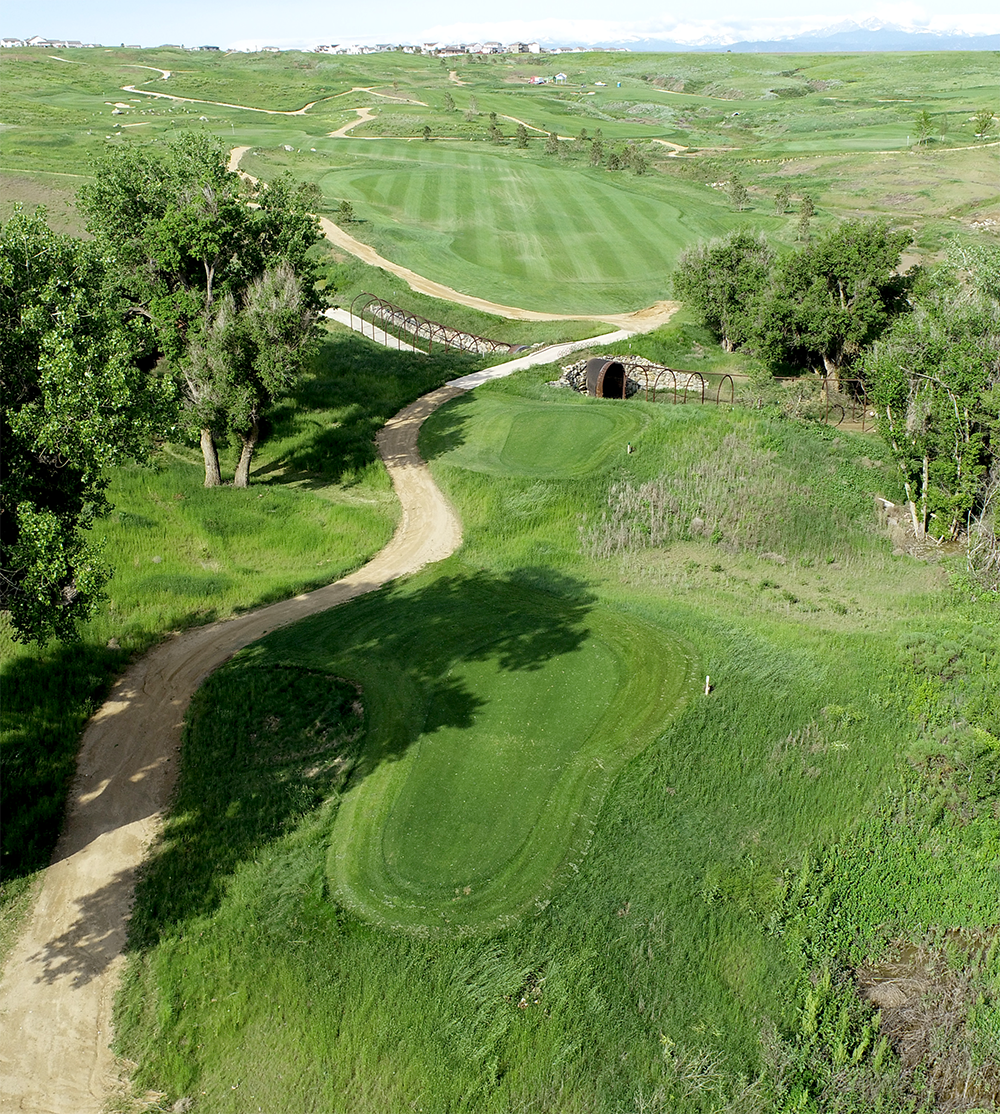
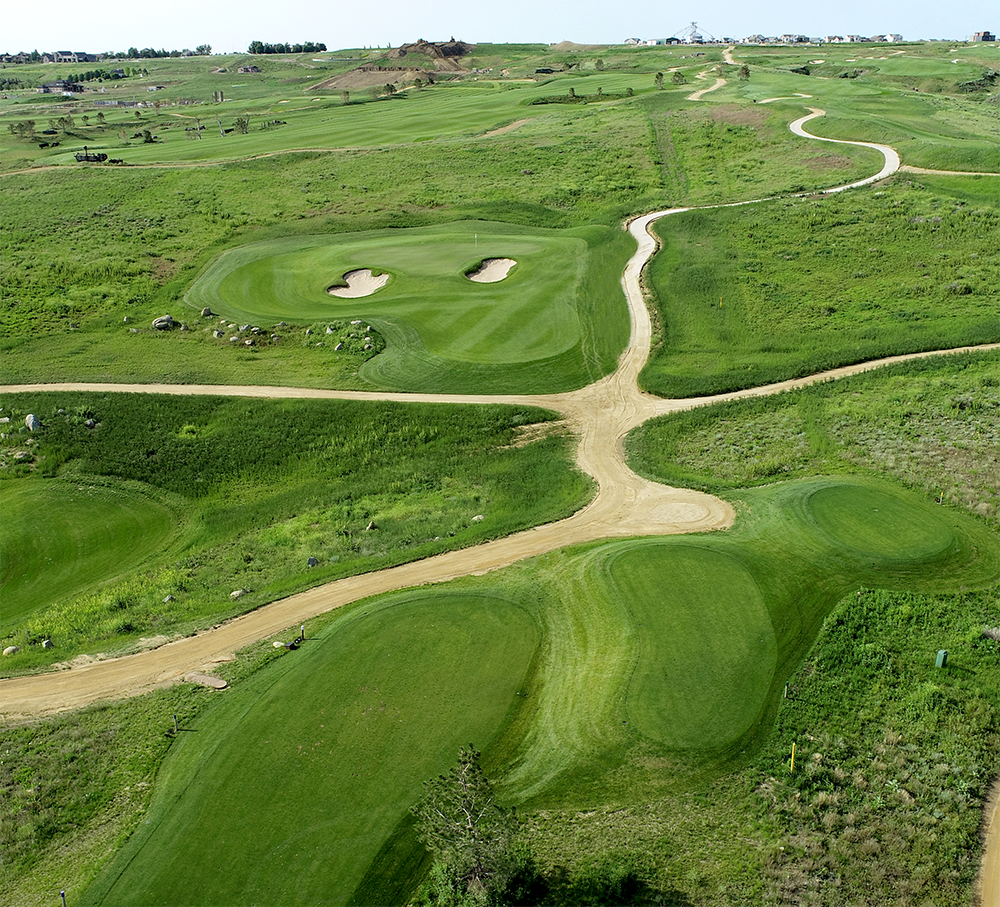
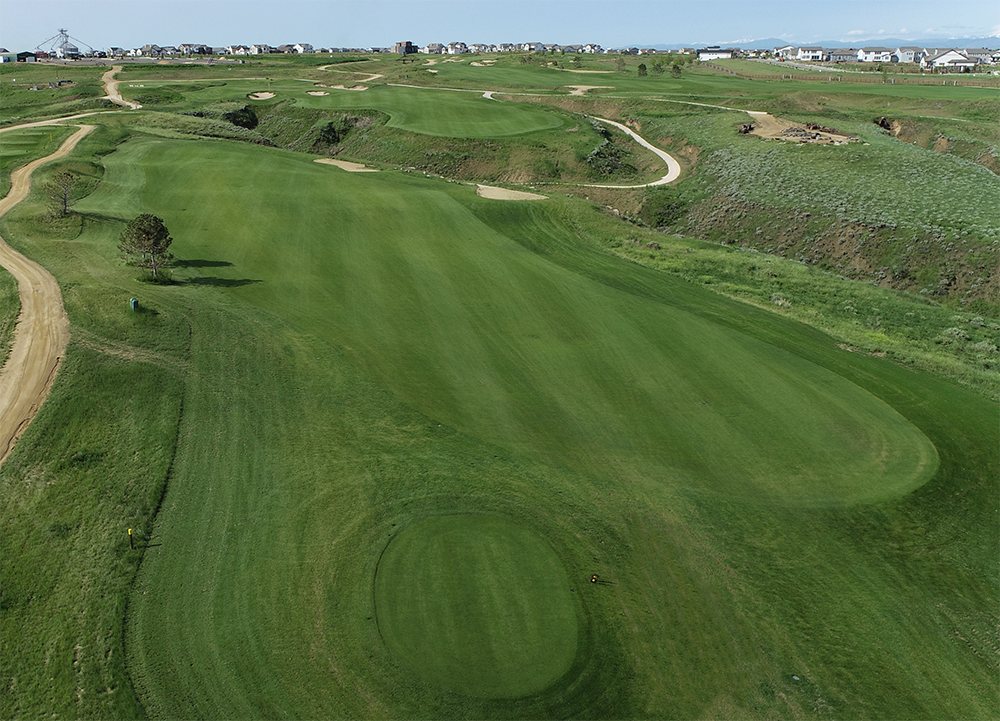
Hole-By-Hole Breakdown

Get to know the course before you tee off. Our hole-by-hole guide gives you a closer look at each of RainDance National’s 18 unforgettable holes—complete with tips, yardages, and features that make every swing a new adventure.

Hole 1

Par 4 | HDCP 13

Hole 1

The northernmost fourteener in Colorado, Longs Peak, is the backdrop to this spectacular opening hole and the aiming point for a player's shot into the green. The landing zone is much larger than it looks, but a straight drive is still ideal. A receptive green for your first approach but short or right is no good.

Yardage
  • Tour 493
  • Purple 467
  • Blue 436
  • White 369
  • Green 350
  • Yellow 319
View

Hole 3

Par 4 | HDCP 11

Hole 3

Drivable for some. Double-able for others. Choose wisely off the tee. Green is receptive to drives, but so are the four bunkers. Many say it's the easiest hole on the course, but they probably hit their drive straight. If the pin is on the right, add a few yards as the greenside bunker is a magnet.

Yardage
  • Tour 362
  • Purple 332
  • Blue 308
  • White 263
  • Green 238
  • Yellow 216
VIEW

Hole 4

Par 4 | HDCP 3

Hole 4

The first of back-to-back-nearly-600-yard-par 4s. Relax, that's only from the Tour tees. For everyone else, they are the #3 and #1 handicap holes. The hole plays 52 feet downhill with a blind tee shot. Take it off the left bunkers and let it fly. If you don't clear the hill, watch out for the arroyo at the base of the hill on your second shot. Actually, watch out for it no matter where you are.

Yardage
  • Tour 587
  • Purple 552
  • Blue 486
  • White 460
  • Green 409
  • Yellow 337
VIEW

Hole 5

Par 4 | HDCP 1

Hole 5

Enjoy the ride! Hole plays 77 feet downhill. Way more room to the right off the tee, left and it's a goner. Fairway slopes hard down and right to left. Now that you've hit the best drive of your life, you should have a pretty straight-forward, uphill, forced-carry approach to a fun little green. Take plenty of club on the approach, get up and down, and pat yourself on the back. They all get easier from here.

Yardage
  • Tour 597
  • Purple 543
  • Blue 489
  • White 471
  • Green 437
  • Yellow 313
VIEW

Hole 6

Par 3 | HDCP 17

Hole 6

This hole was supposed to play the other direction but thankfully, Fred changed his mind. A beautiful-looking golf hole that should put a wedge or small iron in most player's hands. Get it on the surface and get your birdie.

Yardage
  • Tour 195
  • Purple 176
  • Blue 152
  • White 126
  • Green 109
  • Yellow 89
VIEW

Hole 7

Par 5 | HDCP 5

Hole 7

See that bunker? Do not go there. You have plenty of room to the right. Second shot here will make you think. The landing zone is wider the closer you get to the green so give it a ride. Lay back too far and you may not see the putting surface. Go for it, and you better be able to have it drop and stop from 275. Middle of this green is a nice back-to-front sloping valley. Lots of ways to be creative here.

Yardage
  • Tour 617
  • Purple 591
  • Blue 542
  • White 496
  • Green 458
  • Yellow 444
VIEW

Hole 8

Par 3 | HDCP 9

Hole 8

Look at that green! It tends to play pretty true to the number. Three distinct sections to the green. Front pin is the go-zone. Back right pin and you can funnel it back there. Back left pin... well... there is a backstop up there, but that is just a really good pin..

Yardage
  • Tour 270
  • Purple 223
  • Blue 191
  • White 173
  • Green 138
  • Yellow 115
VIEW

Hole 9

Par 4 | HDCP 7

Hole 9

Rip it from the back tees. From the forward tees, note that the fairway gets narrow quickly. Blind approach but look for the 9-foot-tall pin to help you aim. This green is 65,000 square feet but we try to only use a small section of it for #9. A right pin is down in a bowl, a left pin is up on a ridge well-guarded by a bunker. Get it there, but don't go long.

Yardage
  • Tour 501
  • Purple 452
  • Blue 346
  • White 330
  • Green 314
  • Yellow 280
VIEW

Hole 10

Par 4 | HDCP 4

Hole 10

Take it over the right bunker and watch it run. More room to the right than you think off the tee. One of the best green complexes on the property. Left pin is in a depression, short and right usually bounces up to the green, and you must stay short of a back pin.

Yardage
  • Tour 602
  • Purple 543
  • Blue 479
  • White 442
  • Green 422
  • Yellow 319
VIEW

Hole 11

Par 4 | HDCP 12

Hole 11

Back up we go. Aim at the center bunker, but do not hit it in there. Not a driver for most. Approach will be an uphill lie so take more club. The green sneakily falls off most sides. Long and left is the miss, short and right is not.

Yardage
  • Tour 384
  • Purple 373
  • Blue 345
  • White 335
  • Green 304
  • Yellow 277
VIEW

Hole 12

Par 3 | HDCP 10

Hole 12

Just another island green surrounded by native grasses and arroyos. Make a confident swing to the middle of the green. Many question their club selection mid-swing, so if you don't make it, there's a drop zone available on the forward tees.

Yardage
  • Tour 220
  • Purple 201
  • Blue 184
  • White 160
  • Green 116
  • Yellow 74
VIEW

Hole 13

Par 5 | HDCP 6

Hole 13

See that old thresher in the distance? Aim for that. Split fairway with lots of roll. Many ground-game options for the second and third shots. That arroyo on the right is a deep one. Green is subtle, but sneaky. Usually best to land it left of the pin.

Yardage
  • Tour 752
  • Purple 653
  • Blue 590
  • White 564
  • Green 547
  • Yellow 497
VIEW

Hole 14

Par 3 | HDCP 18

Hole 14

Would you look at that?! Water is not in play, but hole-in-one's are! Great little downhill hole. Short and right shots usually work back to the center of the green. Make your ace and move on.

Yardage
  • Tour 217
  • Purple 205
  • Blue 163
  • White 138
  • Green 118
  • Yellow 98
VIEW

Hole 15

Par 4 | HDCP 8

Hole 15

Must. Stay. Left. Go ahead and tempt it, we all have, but the right side of the fairway is not kind to most. Approach is straight forward but a back pin is a long way back there as the green is 41 paces deep and flows significantly back to front.

Yardage
    Tour
  • Tour 541
  • Purple 506
  • Blue 431
  • White 390
  • Green 324
  • Yellow 315
VIEW

Hole 16

Par 5 | HDCP 14

Hole 16

Split the uprights and find your ball on a nice, large, green runway. As big as this fairway is, Fred actually shrunk it from the original plans. Do your best to find this fairway and you can go at this par-5 in two. Yes, that is a leisurely, public walking trail you must hit over, but don't think about that, think about making eagle. The further right you go, the better angle, but the further left will give you a shorter number. Green is wide open with short grass on every side and zero bunkers.

Yardage
  • Tour 594
  • Purple 542
  • Blue 499
  • White 431
  • Green 382
  • Yellow 308
VIEW

Hole 17

Par 3 | HDCP 16

Hole 17

The smallest green on the course can be an easy deuce or a hard double bogey. Most players will have a wedge unless the tees are on the east side. That angle adds distance and hides bunkers. Green has a back tier that can balls easily spin off. Play smart..

Yardage
  • Tour 197
  • Purple 183
  • Blue 157
  • White 141
  • Green 123
  • Yellow 112
VIEW

Hole 18

Par 5 | HDCP 2

Hole 18

Only 621 more yards! And most of them need to be airborne. Tee shot may not be a driver as the fairway abruptly turns into a deep arroyo. From there you have options. Lay up across to the right and risk not seeing the pin for your third shot or bust it up by the green and risk the bunkers/arroyos. There is no wrong answer, but you should be on short grass for your approach as this green has some pin locations. No ball stops in the middle of this green, so aim and execute wisely.

Yardage
  • Tour 621
  • Purple 561
  • Blue 510
  • White 446
  • Green 418
  • Yellow 375
VIEW

Golf Apparel FAQs

Have questions about what to wear at RainDance National?

We’ve got you covered. Below are answers to the most commonly asked questions about golf attire, so you can feel confident and comfortable before you step onto the course.
  • Collared shirt (similar to the image below)
  • Pants, shorts of medium length
  • Shirts must have sleeves or a collar
  • Pants, shorts/skirts/skorts of medium length

Golf or tennis shoes are recommended
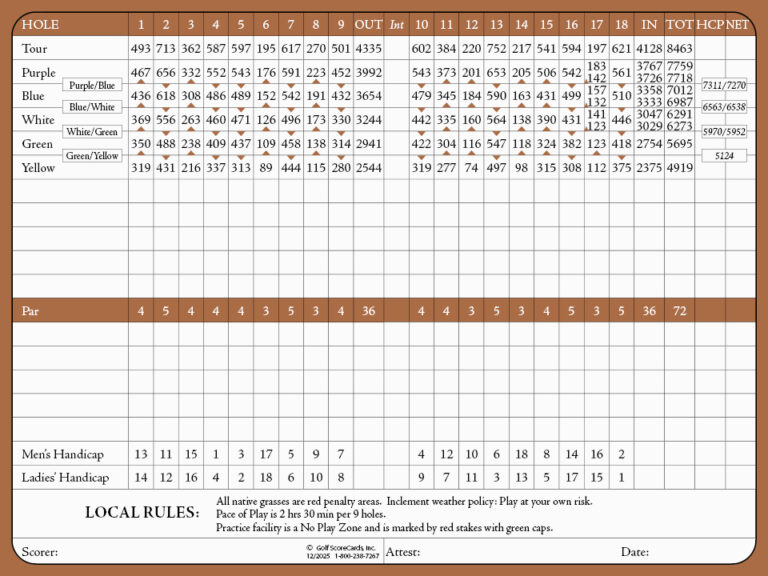
  • T-Shirts, tank tops, muscle shirts, spaghetti straps, halter tops
  • Denim, cutoff pants, sweatpants, gym shorts
  • Metal spikes are prohibited

Course Scorecard

Want the full layout at a glance? Our official scorecard offers a complete overview of yardages, pars, and handicaps for all 18 holes at RainDance National. It’s your quick reference for planning strategy—and tracking your best round yet.

Let's Chat

Have a question, comment, or request? We’d love to hear from you. Fill out the form below and a member of our team will get back to you as soon as possible. Whether you’re planning a visit, exploring membership, or just curious about the course—we’re here to help.